
Knowing how to check oil is one of the most important vehicle maintenance skills every driver should master. Engine oil serves as the lifeblood of a vehicle, lubricating moving components, reducing friction, controlling temperature, and preventing premature engine wear. A simple oil inspection takes only a few minutes but can help avoid expensive mechanical failures and extend engine life significantly.
Many vehicle owners overlook routine oil inspections until warning lights appear on the dashboard. Unfortunately, by that point, engine damage may already be occurring. Regularly checking oil levels allows us to identify low oil conditions, contamination, leaks, or signs that an oil change is needed before serious issues develop. Whether driving a compact car, SUV, truck, or hybrid vehicle, understanding the correct procedure ensures accurate readings and reliable engine performance.
This comprehensive guide explains everything needed to properly inspect engine oil, interpret oil condition, and maintain optimal lubrication for long-term vehicle health.
Why Checking Engine Oil Is Important
Engine oil performs several critical functions within a vehicle. It lubricates metal components, reduces wear, cleans contaminants, protects against corrosion, and helps regulate operating temperatures. When oil levels become too low, internal parts experience increased friction, which can lead to overheating and severe engine damage.
Regular oil inspections provide several benefits:
- Improved engine longevity
- Better fuel efficiency
- Reduced maintenance costs
- Early detection of leaks
- Enhanced vehicle performance
- Prevention of overheating
- Protection against costly engine repairs
A few minutes spent checking oil can save thousands of dollars in repair expenses over the lifetime of a vehicle.
When to Check Your Oil
The best time to check engine oil is when the vehicle is parked on a level surface and the engine has been turned off for several minutes. This allows the oil to drain back into the oil pan and provides a more accurate reading.
Many automotive experts recommend checking oil:
- Once every month
- Before long road trips
- After noticing dashboard warning lights
- When experiencing unusual engine noise
- Before purchasing a used vehicle
- Between scheduled oil changes
Consistent monitoring helps establish a maintenance routine and ensures the engine always has adequate lubrication.
Tools Needed to Check Oil
One of the advantages of checking oil is that very few tools are required. In most cases, all we need includes:
- A clean paper towel or cloth
- Adequate lighting
- Protective gloves (optional)
- Vehicle owner’s manual for reference
These simple items make the process quick, easy, and accessible for virtually any vehicle owner.
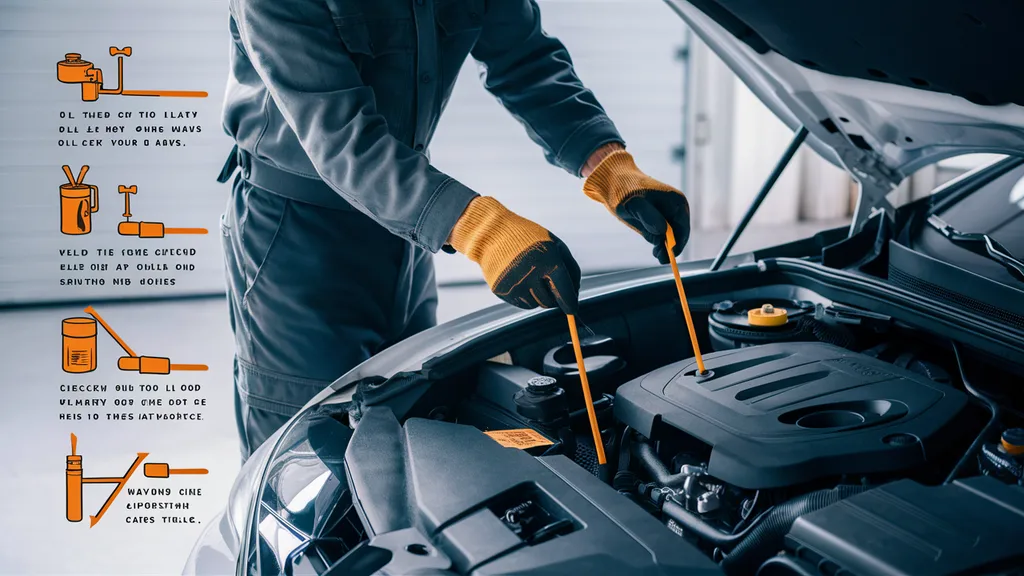
How to Check Oil: Step-by-Step Guide
Step 1: Park on a Flat Surface
Ensure the vehicle is parked on level ground. Uneven surfaces can cause inaccurate oil readings because oil may collect on one side of the oil pan.
Turn off the engine and wait approximately five to ten minutes before proceeding.
Step 2: Locate the Oil Dipstick
Open the hood and secure it properly. Locate the oil dipstick, which is typically identified by a brightly colored handle, often yellow, orange, or red.
The owner’s manual can help identify the exact location if needed.
Step 3: Remove the Dipstick
Carefully pull the dipstick out completely. The first reading is often inaccurate because oil may have splashed onto the dipstick during engine operation.
Use a clean cloth or paper towel to wipe the dipstick thoroughly.
Step 4: Reinsert the Dipstick
Insert the cleaned dipstick fully back into its tube. Ensure it is seated completely before removing it again.
This second reading provides the most accurate measurement.
Step 5: Check the Oil Level
Pull the dipstick out once more and examine the oil level markings.
Most dipsticks contain indicators such as:
- MIN and MAX
- LOW and FULL
- Crosshatched measurement zones
The oil should ideally be near the maximum or full mark without exceeding it.
If the oil level is below the minimum mark, additional oil should be added immediately according to manufacturer specifications.
Step 6: Inspect Oil Condition
Checking oil quantity is only part of the process. We should also evaluate oil quality.
Healthy oil generally appears:
- Amber or light brown
- Smooth in texture
- Free from debris
Potential warning signs include:
- Dark black oil
- Thick sludge-like consistency
- Metal particles
- Milky appearance
- Burnt smell
These conditions may indicate contamination, coolant leaks, overheating, or the need for an oil change.
How to Interpret Oil Color
Many drivers assume dark oil automatically means it needs replacement. While color can provide clues, it should not be the sole determining factor.
Amber Oil
Fresh and clean oil often appears amber or golden.
Dark Brown Oil
Normal for oil that has been used for some time but still performs adequately.
Black Oil
May indicate that the oil has collected contaminants and could require replacement soon.
Milky Oil
Usually suggests coolant contamination, which requires immediate professional inspection.
Foamy Oil
May indicate excessive oil levels or moisture contamination.
Understanding oil appearance helps identify problems before they escalate.
Common Mistakes When Checking Oil
Many vehicle owners unintentionally make errors that lead to inaccurate readings.
Checking Immediately After Driving
Oil remains distributed throughout the engine, resulting in false low readings.
Parking on a Slope
Uneven surfaces distort oil level measurements.
Ignoring Oil Quality
Quantity matters, but oil condition is equally important.
Overfilling Engine Oil
Too much oil can create pressure issues and damage engine components.
Using the Wrong Oil Type
Always follow manufacturer recommendations regarding viscosity and specifications.
Avoiding these mistakes ensures reliable maintenance decisions.
How Often Should Oil Be Changed?
Oil change intervals vary based on vehicle type, driving habits, and oil formulation.
General guidelines include:
- Conventional oil: every 3,000–5,000 miles
- Synthetic blend oil: every 5,000–7,500 miles
- Full synthetic oil: every 7,500–15,000 miles
Always consult the vehicle owner’s manual for manufacturer-specific recommendations.
Modern vehicles often include maintenance monitoring systems that calculate oil life based on actual driving conditions.
Signs Your Vehicle Needs an Oil Change
In addition to checking oil levels, several indicators suggest replacement may be necessary.
Common signs include:
- Oil warning light
- Increased engine noise
- Poor fuel economy
- Burning oil smell
- Excessive exhaust smoke
- Rough engine operation
- Dirty or thick oil on the dipstick
Addressing these signs promptly helps prevent unnecessary wear and costly repairs.
Benefits of Regular Oil Monitoring
Consistently checking engine oil provides long-term advantages.
These include:
- Improved reliability
- Enhanced fuel efficiency
- Better engine protection
- Lower maintenance expenses
- Longer engine lifespan
- Reduced risk of breakdowns
Routine inspections represent one of the easiest and most effective forms of preventive vehicle maintenance.
Conclusion
Learning how to check oil is a fundamental skill that every vehicle owner should possess. A quick monthly inspection can dramatically improve engine reliability, performance, and longevity while reducing the risk of expensive mechanical failures. By parking on a level surface, using the dipstick correctly, evaluating oil condition, and monitoring oil levels consistently, we can keep our vehicles operating efficiently for years. Regular oil checks combined with timely oil changes create a strong foundation for responsible vehicle maintenance and help ensure optimal engine health under all driving conditions.
Frequently Asked Questions (FAQ)
How often should I check my engine oil?
Most experts recommend checking engine oil at least once per month and before long trips.
Can I check oil when the engine is hot?
Yes, but it is best to wait five to ten minutes after shutting off the engine for a more accurate reading.
What happens if oil is too low?
Low oil levels can cause excessive friction, overheating, engine wear, and potentially catastrophic engine damage.
What color should healthy engine oil be?
Healthy oil is typically amber, golden, or light brown depending on age and usage.
Can I add oil without changing it?
Yes, adding oil can restore proper levels, but old or contaminated oil may still require a complete oil change.
Should oil be at the maximum mark?
Ideally, oil should be near the full or maximum indicator without exceeding it.
What does milky oil mean?
Milky oil often indicates coolant contamination and should be inspected by a qualified mechanic immediately.
Is checking oil difficult for beginners?
No. The process is simple, requires minimal tools, and typically takes less than five minutes to complete.