

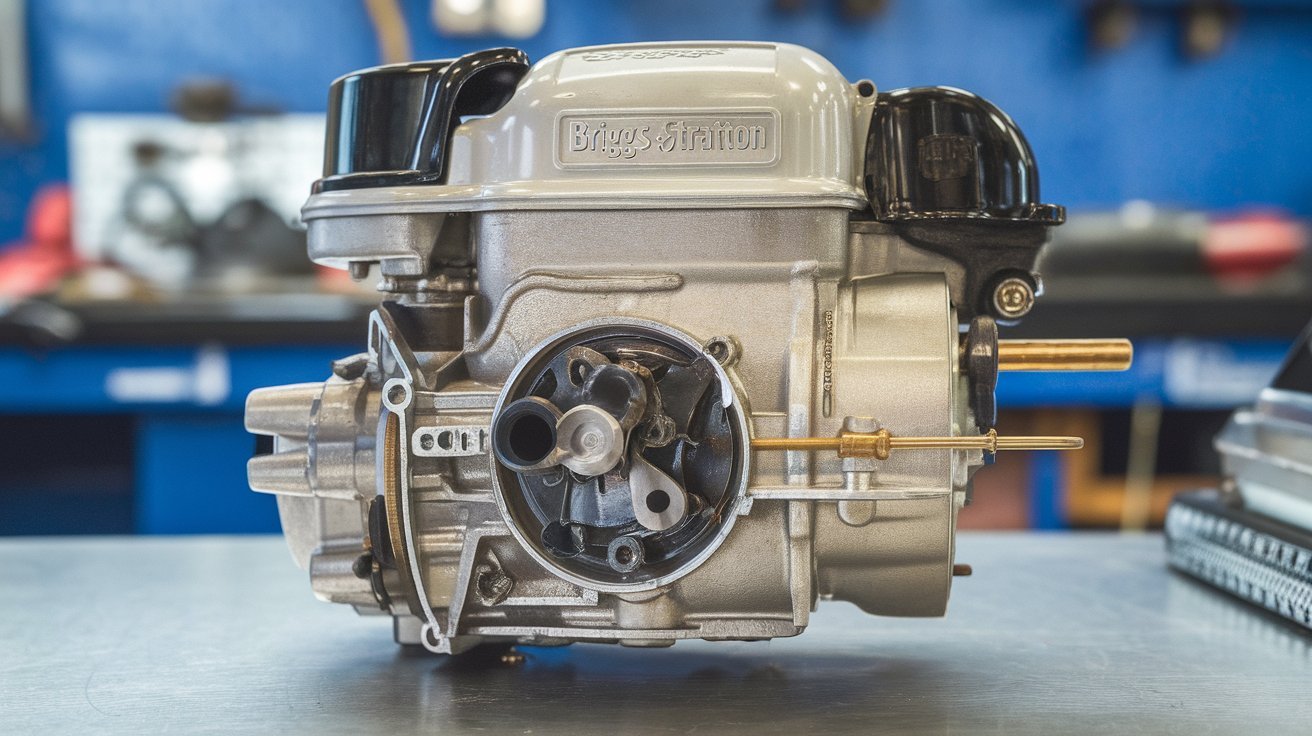
A dirty carburetor is one of the most common reasons a Briggs & Stratton small engine becomes difficult to start, runs roughly, stalls, surges, or loses power. Lawn mowers, pressure washers, generators, tillers, and other outdoor power equipment can develop carburetor problems when old fuel, dirt, varnish, or moisture builds up inside the fuel system.
Learning how to clean a carburetor Briggs and Stratton engine can restore normal fuel flow and improve engine performance. The process is generally straightforward, but it requires careful handling because small carburetor components can be easily damaged or misplaced.
Before beginning, we should identify the engine model and follow the instructions for that particular carburetor. Briggs & Stratton uses several carburetor designs, so the exact removal and adjustment procedure can vary.
Why a Briggs and Stratton Carburetor Gets Dirty
The carburetor controls the mixture of fuel and air entering the engine. When the engine is running correctly, the carburetor delivers the appropriate amount of fuel for combustion. When its passages become restricted, the engine may not receive enough fuel.
Old gasoline is a major cause of carburetor contamination. Fuel that sits for an extended period can deteriorate and leave gum or varnish deposits inside the carburetor. Dirt and debris can also enter through the fuel system, while water contamination can contribute to corrosion.
Common symptoms of a dirty carburetor include:
- Hard starting
- Engine starts and then stalls
- Rough or uneven running
- Engine surging
- Poor acceleration
- Reduced power
- Excessive fuel consumption
- Engine running only with the choke partially engaged
Not every starting problem is caused by the carburetor. A clogged air filter, bad spark plug, stale fuel, fuel-line restriction, or ignition problem can produce similar symptoms. Therefore, it is useful to inspect the basic engine components before completely removing the carburetor.
Tools and Supplies Needed
The tools required depend on the specific Briggs & Stratton engine and carburetor. A typical cleaning job may require basic screwdrivers, sockets or nut drivers, pliers, carburetor cleaner, a clean container, shop towels, and compressed air.
A replacement gasket or carburetor bowl O-ring may also be useful. If a gasket is damaged during removal, it should generally be replaced rather than reused.
For safety, work in a well-ventilated area away from flames, sparks, cigarettes, heaters, and other ignition sources. Gasoline and many carburetor-cleaning products are flammable.
Wear appropriate eye protection and avoid spraying cleaner toward your face. Do not use an open flame to inspect gasoline or attempt to dry fuel-system components.
It is also helpful to take photos before removing parts. This provides a reference for routing fuel lines, reinstalling linkages, and positioning springs or other small components.
How to Remove the Briggs and Stratton Carburetor
Start by allowing the engine to cool completely. Disconnect the spark plug wire and secure it away from the spark plug so the engine cannot accidentally start while you are working.
If the equipment has a fuel shutoff valve, close it. If there is no valve, the fuel system may need to be drained or the fuel line clamped using a suitable method. Avoid damaging the fuel line.
Remove the air-filter cover and air filter as necessary to gain access to the carburetor. Depending on the engine design, you may need to remove the air-filter housing.
Before disconnecting anything, take clear photographs of the throttle linkage, governor linkage, springs, and fuel line. These parts must return to their original locations.
Remove the fuel line carefully and be prepared for a small amount of gasoline to escape. Place an approved fuel container underneath the connection.
Remove the fasteners securing the carburetor to the engine. Keep screws, nuts, washers, and other parts organized so they can be returned to their original positions.
How to Clean the Carburetor
Once the carburetor is removed, place it on a clean work surface. If the carburetor has a removable float bowl, carefully remove the bowl and inspect the inside.
Look for dirt, corrosion, fuel deposits, and other contamination. Old gasoline inside the bowl should be disposed of properly rather than poured onto the ground.
Remove the float and needle valve only if the carburetor design and service instructions permit it. Handle these components carefully because the needle, float, and retaining parts are small.
Spray an appropriate carburetor cleaner into accessible fuel passages and openings. Allow deposits to soften before wiping the components with a clean cloth.
Small passages and jets require particular care. Use only cleaning tools that are appropriate for the carburetor. Do not force hard metal objects through precision passages, because enlarging or damaging a jet can change fuel metering and cause the engine to run incorrectly.
Compressed air can be useful for clearing loose debris from passages. Use controlled pressure and wear eye protection because cleaner and debris can be expelled unexpectedly.
Clean the carburetor bowl, exterior surfaces, fuel passages, and removable components. Replace damaged seals, gaskets, or O-rings.
Reassemble and Reinstall the Carburetor
After cleaning, allow all components to dry completely. Reassemble the carburetor in the reverse order of disassembly.
If the carburetor uses a float and needle valve, make sure these parts move freely and are installed correctly. Do not force components into place.
Install a new bowl gasket if the original is damaged or the service instructions call for replacement. Tighten fasteners securely but avoid overtightening small carburetor screws or bolts.
Return the carburetor to the engine and reconnect the fuel line, throttle linkage, governor linkage, springs, and other connections exactly as they were originally positioned.
Reinstall the air-filter housing and a clean air filter. A heavily dirty air filter can restrict airflow and cause running problems even after the carburetor has been cleaned.
Reconnect the spark plug wire only after the carburetor and surrounding components are securely installed.
Starting and Testing the Engine
Before starting the engine, inspect the fuel system for leaks. Make sure the fuel tank, fuel line, carburetor bowl, and connections are dry on the outside.
Use fresh, appropriate fuel. If the previous fuel was old or contaminated, replacing it can help prevent the freshly cleaned carburetor from becoming contaminated again.
Start the engine according to the manufacturer’s normal procedure. Do not immediately assume that a rough first few seconds means the cleaning failed. Some engines may need a short period to stabilize after fuel-system service.
Observe the engine while it runs. It should idle and accelerate without excessive surging, stalling, or fuel leakage.
If the engine still runs poorly, avoid randomly adjusting the carburetor. The problem could involve the spark plug, ignition system, air filter, fuel supply, governor system, compression, or another component.
Some modern Briggs & Stratton carburetors are designed with limited or no user adjustment. In those cases, cleaning or replacing the carburetor may be more appropriate than attempting to alter factory settings.
How to Prevent Future Carburetor Problems
Preventive maintenance can reduce the likelihood of another clogged carburetor. Use fresh fuel, keep the fuel system clean, and follow the engine manufacturer’s recommendations for fuel storage.
When equipment will sit unused for an extended period, follow the storage instructions in the owner’s manual. Depending on the model and manufacturer’s recommendations, this may involve treating fuel appropriately or draining the fuel system.
Replace the air filter and spark plug according to the recommended maintenance schedule. Keep dirt away from the fuel tank opening and avoid introducing debris while refueling.
Regularly inspect fuel lines for cracking, deterioration, or leakage. A damaged fuel line can create both performance and safety problems.
It is also important to use the correct fuel and avoid mixing inappropriate substances into the tank. Always follow the fuel requirements specified for the particular Briggs & Stratton engine.
When to Replace Instead of Clean the Carburetor
Cleaning is not always the best solution. If the carburetor has severe corrosion, damaged threads, broken components, worn passages, or irreparable seals, replacement may be more practical.
A replacement carburetor should match the engine’s exact model, type, and trim information. Briggs & Stratton engines can use different carburetor configurations, so appearance alone is not a reliable way to select a replacement.
If repeated cleaning does not solve the problem, it is better to diagnose the entire fuel and ignition system rather than repeatedly disassembling the carburetor.
Frequently Asked Questions
How often should a Briggs and Stratton carburetor be cleaned?
There is no universal cleaning interval. A carburetor generally needs cleaning when contamination or symptoms indicate a fuel-system problem. Good fuel storage and regular maintenance can reduce the need for cleaning.
Can I clean a Briggs and Stratton carburetor without removing it?
For light external contamination, some cleaning can be performed without complete removal. However, thorough internal cleaning generally requires access to the bowl, jets, and fuel passages.
Why does my Briggs and Stratton engine only run with the choke on?
This can indicate a lean fuel mixture or restricted fuel passage, including a partially clogged carburetor. However, other fuel-system problems can produce the same symptom.
Can I use compressed air to clean the carburetor?
Yes, controlled compressed air can help remove loose debris from suitable passages. Wear eye protection and avoid excessive pressure that could damage delicate components.
Should I replace the carburetor instead of cleaning it?
If the carburetor is severely corroded or damaged, replacement may be appropriate. If it is simply contaminated with old fuel deposits, careful cleaning may restore operation.
Conclusion
Knowing how to clean a carburetor Briggs and Stratton engine can be valuable for maintaining lawn mowers and other small-engine equipment. Old fuel, varnish, dirt, and restricted passages can interfere with normal fuel delivery and lead to difficult starting, stalling, surging, and poor performance.
The most important steps are to work safely, disconnect the spark plug, control the fuel supply, document linkage positions, clean the carburetor carefully, avoid damaging precision passages, replace damaged gaskets, and inspect for leaks before starting the engine.
Because Briggs & Stratton produces many different engine and carburetor configurations, the exact procedure should always be checked against the engine’s model-specific instructions. When cleaning does not resolve the problem, further diagnosis of the fuel, ignition, air, governor, and compression systems may be necessary.